


Furniture Makeover Using Decoupage Paper: Part One!
- Lori Siegel

- Apr 12, 2022
- 4 min read
Updated: Aug 21, 2024
This week, I started working on an antique dresser. My plan was to decoupage the front of the dresser and paint the rest with chalk paint. Two things happened to put a kibosh on my plans. The dresser needed more work than I initially thought, and being my first time decoupaging on furniture, I wanted to take my time and not rush it. What I am trying to say is there will not be a reveal this week.
So, with that, I will share what I have done so far!


I purchased this dresser on Facebook Marketplace a few weeks ago. It is a solid piece with great lines. It just needed a little love.


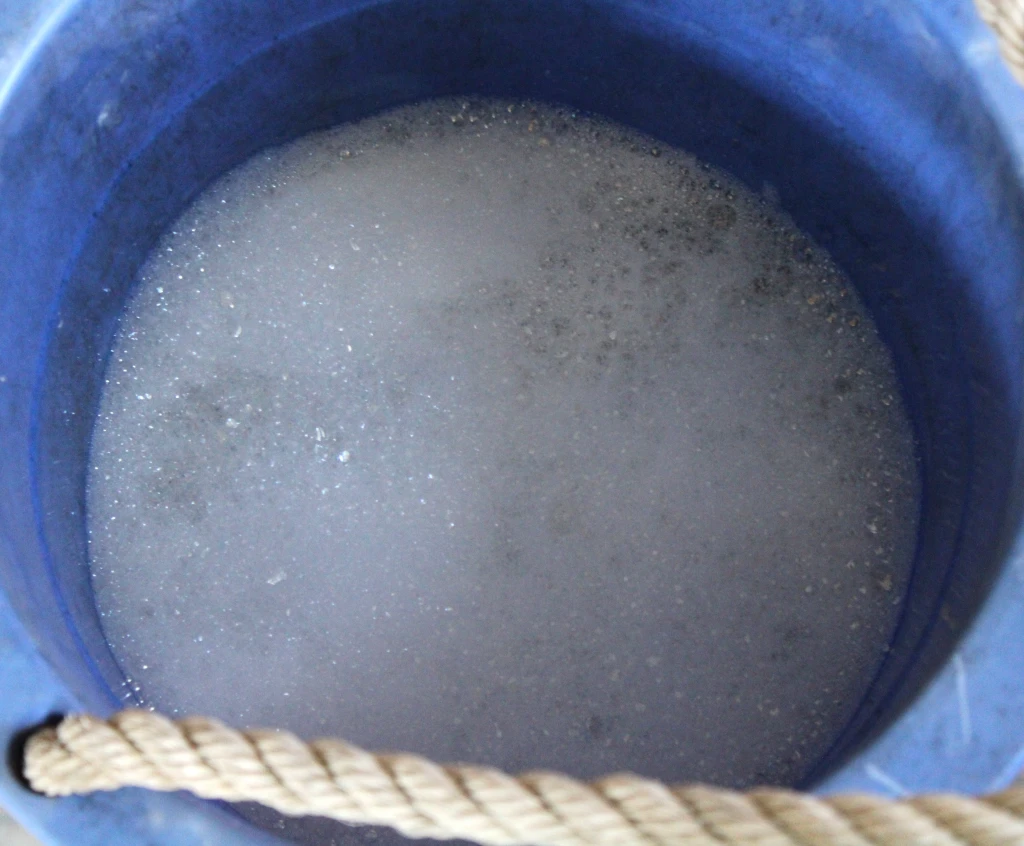
After removing the hardware, I cleaned the dresser with an all-purpose cleaner (all products used will be listed at the end of post). It was so dirty I had to change the water three times before I was finished. It was while I was cleaning that I began to notice just how much “love” it actually going to need.


Since the top of the dresser was beyond repair, I sanded it down to prepare it for painting. There were areas where the veneer was peeling and some where it had completely come off. To address this, I carefully applied glue underneath the lifting veneer using a kabob stick and then placed books on top to hold it in place while it dried. For the sections where the veneer was missing entirely, I filled them in with spackle. Additionally, there were pieces of molding that also required regluing
I told you it needed a lot of work.


With all the prep work done, it was ready for primer not only to give it a good base coat but also to prevent bleed-through.
It took longer than I expected, but it is ready for the next step. Decoupage!


Here is a sneak peek of the decoupage design I chose. I love this paper!
If you enjoyed this post, please give it a "like" and subscribe to receive new posts as they are created.
Be on the lookout for: Decoupage Dresser Makeover Part Two: The reveal!
I removed all the hardware. They are gorgeous!
My husband sanded the top for me since my allergies were acting up.
There were a few pieces of molding that needed to be glued back into place.
On the top of the dresser some of the veneer was pulling up. I used a cabob stick to push the glue underneath. Then placed some books on top to keep it in place while it dried.
In other areas the veneer was completely off. I filled those spots with spackle.
The first thing I did was clean it thoroughly. I had to empty my bucket three times until the water ran clear. After it dried, I reattach loose trim pieces then attempted to secure the peeling veneer on top with glue, but it was unsuccessful. I had to remove the veneer pieces and fill them in with spackle. Next, I sanded everything to achieve a smooth finish. Following that, I applied odor-blocking primer to the entire piece, including the top, which was not in good enough shape for staining. I applied three coats of primer to reduce any odors and prevent bleeding through the paint.


I love this Decoupage paper and was really excited (albeit nervous) to try it!
To prepare, I watched dozens of YouTube videos demonstrating different techniques for decoupaging furniture. I decided to go with wallpaper paste because it gives you more placement time, which would definitely benefit me.
I gathered all my tools: a paintbrush and roller for applying paste, chip brushes to help smooth, an X-Acto knife to remove excess paper and cut seams, and an awl to punch out drawer holes. I was ready to begin.


I positioned the decoupage paper with the rose in the center, secured it with painter's tape, and proceeded to apply wallpaper paste before laying down the paper.
Realizing I had made a mistake by trying to apply the decoupage paper while the dresser was upright it was impossible to manage and the paper tore.
I called my husband (I may have screamed) to help me lay the piece down. We laid it down; I thanked him, and I went back to work. I can be intense when something is going wrong. He is the best husband!
After we brought the dresser down, it was much easier to handle. Moving forward, I made some other changes: cutting the decoupage paper, working on each drawer separately, and using the chip brush instead of my hands.
Making these changes made the application much better. There were still tears and frustration when trying to get the paper into all the intricate places on the piece. However, I was able to repair the rips using extra paper by placing it and pasting over it, and you could not even tell.
If you enjoyed this post, please give it a "like" and subscribe to receive new posts as they are created.
Keep a lookout for "Decoupage Dresser Part Two: The Reveal!

Comments