


Framed Television Hack!
- Lori Siegel

- Jan 27, 2025
- 2 min read
After our remodel, the kitchen, dining, and family rooms were seamlessly open to one another. My husband wanted the TV on the back wall in the family room for optimal viewing, but I didn't want a large black screen to be the first thing you see as you walk in. As a compromise (bribe) we purchased a larger 50" TV which would be placed on a wall where it wouldn't be immediately noticeable, with the couch positioned on the back wall.
This setup worked for years, but when the TV started acting up, we considered a replacement. I saw an ad for a TV with a frame that displays artwork, which was more appealing than a large black screen. I mentioned it to my husband, and we decided to explore it.

This is the framed TV I saw in the advertisement; however, it proved to be quite costly, and installing it required making a hole in the wall, which ended that idea. Still interested in something similar, we inquired with the tech store salesperson whether artwork could be displayed on a regular TV and if frames were available for the TV model we selected. The answer to both was yes. This information prompted us to purchase the TV (a 65" this time, not sure how that happened). Besides having it delivered, we added installation; we both agreed that it was worth it rather than taking any chances of something going wrong. Meanwhile, we ordered the artwork software and explored frame options. (All products used will be listed at the end of the post).


We were very pleased with the installation service provided by the store we purchased the TV from. They not only installed the TV, but when we told them about the art software, they activated that as well.


Next up was the actual frame for the TV. We looked online and decided that my husband would be able to make a frame in the style we wanted at a fraction of the cost of buying one.
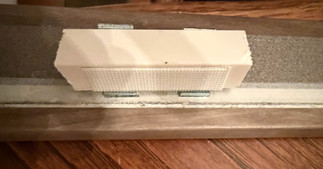
Because the frame would hang directly on the TV, we chose a lightweight composite molding with a natural wood look to use for the frame. My husband mitered the corners and connected them using corner brackets. To hang the frame, he cut small pieces of wood for the top, affixing them with small brackets. Finally, he placed Velcro on the top, sides, and bottom to keep the frame in place.


I absolutely love the way it came out! No black hole on the wall, and the best thing is you can change the artwork to match the decor, season, or holiday.
If you enjoyed this post, please like (check heart at end of post) and subscribe to receive new posts as they are created.
As always, I look forward to your comments and suggestions. Keep them coming!
Products Used:

Comments