


Goodwill Filing Cabinet Transformation Part Two!
- Lori Siegel

- Jul 31, 2024
- 2 min read
Updated: Sep 15, 2024
The first part of this transformation began with my need for a filing cabinet to help me become more organized. After researching new cabinets that were wooden and stylish but also cost-prohibitive, I went to Goodwill where I found a metal cabinet (not my first choice) for $2. The drawers worked, but the outside was a mess. For $2, I decided to give it a try. After cleaning it and removing the lock and drawer, then filling the gaps with bonding agent, the post concluded with me sanding and applying a primer to prepare the cabinet for the next stages. This brings us to this post and the completion of our transformation.
Let's get to it:


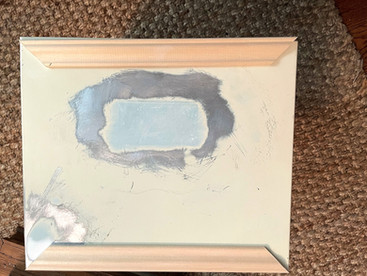
Recap of last post cleaning-removing-bonding agent-sanding


The wooden cabinets I had found online had molding around the edges. In an attempt to replicate the look, I asked my husband to cut some trim pieces that we could attach to the front of each drawer. As soon as I placed the pieces on the drawer, I knew we were heading in the right direction. To adhere the trim, we used a liquid glue (products used will be listed at the end of the post) and then filled in the corners with spackle, leaving it to dry overnight.


The next day, after sanding and prepping for painting, I opened up my beautiful blue color choice (all products used will be listed at the end of the post). I used a brush for the first coat, then switched to a roller to get a smoother finish. To seal the cabinet, I used a clear wax.

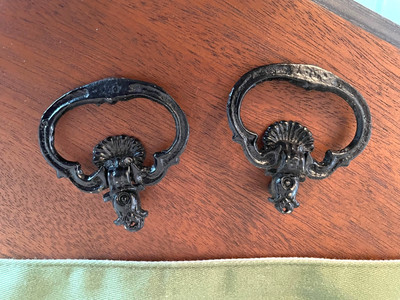

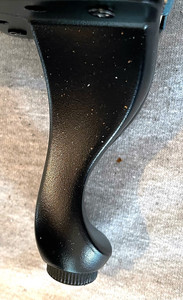
I ordered new handles much better than the pulls and feet to make it look more like a furniture piece.


I must admit that I prefer the refinished metal cabinet over the wooden cabinets I initially wanted. Now it's time to organize.
If you enjoyed this post, please give it a "like" and subscribe to receive new posts as they are created.
Products Used:

Comments